Installing a self-regulating heating cable is a game-changer for keeping pipes, roofs, and walkways safe during cold seasons. This simple solution helps maintain consistent temperatures, prevents freezing, and reduces the risk of costly damage. However, to get the best results, proper installation is key.
If you’re planning to set up self-regulating heating cable, follow these five essential tips for a smooth and effective process.
1. Choose the Right Heating Cable
Selecting the correct heating cable is critical. Not all cables are designed for the same purpose, so understanding your specific needs is crucial.
- Application Type: Identify where the cable will be used—pipes, roofs, or gutters.
- Pipe Material: Ensure the cable suits the material, whether plastic or metal.
- Temperature Requirements: Check the cable’s temperature range and wattage for compatibility with your environment.
- Length of Cable: Measure accurately to avoid too short or excessively long cables.
Pro Tip: Always consult the manufacturer’s specifications for optimal performance.
2. Prepare the Installation Area
Before laying the cable, make sure the area is clean and ready. Proper preparation avoids installation problems.
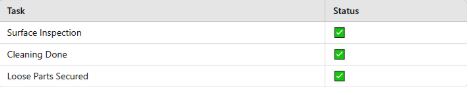
- Inspect Surfaces: Check pipes or roofs for cracks, dirt, or damage.
- Clean Thoroughly: Remove dust, grease, or debris that might affect the cable’s adherence.
- Secure Loose Objects: Tighten loose pipe clamps or roofing components.
Checklist for Preparation:
3. Follow the Correct Installation Technique
Improper installation can lead to poor performance or even cable failure. Use the right steps for success.
- Attach with Tape or Clips: Use heat-resistant materials to secure the cable in place.
- Spacing Matters: Maintain consistent spacing to prevent overheating or cold spots.
- Avoid Overlapping: Overlapping cables can cause overheating and damage.
Pro Tip: Never cross or wrap the cable over itself. This prevents uneven heating.
4. Test Before Finalizing
Testing ensures the cable works as expected before you complete the setup. This saves time and effort later.
- Conduct a Continuity Test: Use a multimeter to confirm the cable is working.
- Check Power Source: Ensure the power outlet or breaker is functional.
- Inspect Connections: Verify all connections are secure and insulated.
Warning: Never test the cable while it’s coiled, as this can lead to overheating.
5. Use a Thermostat for Efficiency
A thermostat helps regulate the heating cable efficiently, saving energy and extending its lifespan.
- Select a Compatible Thermostat: Choose one designed for self-regulating heating cables.
- Proper Placement: Position the sensor where temperature fluctuations are highest.
- Set Appropriate Temperatures: Follow the cable and thermostat guidelines for optimal settings.
Advantages of Using a Thermostat:

Final Thoughts
Installing a self regulating heating cable doesn’t have to be difficult. By choosing the right cable, preparing the area, following proper techniques, testing before finishing, and using a thermostat, you ensure a reliable and efficient setup. This protects your property from freezing and keeps things running smoothly even in extreme weather. Always follow manufacturer instructions and safety guidelines for the best results.
Now you’re ready to install your heating cable with confidence!