
How to Use Electric Tubular Heater For Greenhouse
Maintaining a consistent temperature inside a greenhouse is the backbone of healthy crop production, especially during colder months. One proven solution growers rely on is the electric tubular heater. These compact, energy-efficient devices offer targeted heating without consuming excess power or space. A proper heating strategy can be the difference between healthy growth and plant loss. Here’s a straightforward breakdown of how to use an electric tubular heater effectively for your greenhouse. Why Choose an Electric Tubular Heater? An electric tubular heater is designed to provide localized, low-wattage radiant heat. It helps prevent cold spots, dampness, and frost damage, which are common threats in greenhouses. Advantages include: Energy Efficiency: Low running costs compared to fan or oil heaters. Moisture Control: Reduces condensation, protecting roots and stems. Safety: Built-in thermal protection reduces fire risk. Silent Operation: No mechanical parts or fans mean zero noise. Even Heat Distribution: Ideal for lining along walls or benches. Choosing the Right Size and Wattage Before installation, match the heater size to your greenhouse’s dimensions and insulation level. General guidelines: Small Greenhouses (4-6 ft²): 60W to 120W models. Medium Greenhouses (6-10 ft²): 120W to 180W. Larger Spaces: Multiple heaters or higher wattage units (up to 240W). Make sure the combined wattage aligns with your target temperature. A well-insulated greenhouse typically requires 40-60 watts per square meter to maintain a 5-7°C increase above outdoor temperatures. Installation Tips for Maximum Efficiency Placement matters. Incorrect setup can lead to uneven heating or power waste. Best practices: Mount horizontally along the base of walls, not upright. Keep a 3-4 inch clearance from surfaces to allow air circulation. Avoid blocking with pots, trays, or equipment. Use brackets or wall clips included with most models for safety. Pair the heater with a plug-in thermostat controller. It automates temperature management and avoids overheating. Optimizing Energy Use You don’t need 24/7 operation. Smart usage saves energy and extends heater life. Key strategies: Nighttime Heating: Run heaters when temperatures drop. Thermostat Settings: Aim for 7–12°C for overwintering plants. Zone Heating: Target sensitive areas instead of whole-space heating. Timers: Use digital timers to automate ON/OFF cycles. Maintenance and Safety Guidelines Regular checks ensure safe, long-term performance. Checklist: Wipe heaters monthly to remove dust and debris. Inspect cords and plugs for wear or damage. Check for corrosion on brackets or fittings. Don’t cover the heater—this can cause overheating. Test thermostats periodically to confirm accuracy. Follow manufacturer guidelines for safe operation, especially when working around water. Many electric tubular heater models are IP-rated for moist environments, but don’t assume waterproofing. When to Replace or Upgrade Over time, performance can drop due to internal element fatigue or corrosion. If you notice inconsistent temperatures or visible damage, consider a replacement. Modern heaters often come with built-in thermostats, better heat dispersion, and more accurate controls. Final Thoughts Installing an electric tubular heater is one of the most effective ways to protect your greenhouse plants from cold damage. With the right size, setup, and safety checks, it delivers stable, quiet, and low-cost warmth that supports strong plant growth. Prioritize strategic placement and smart energy usage to get the most out of your investment.
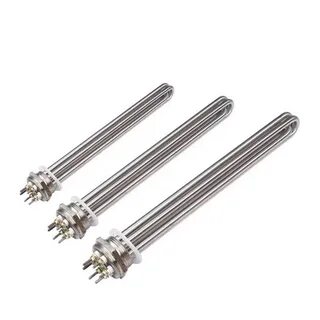
What is The Function of 12 Volt DC Cartridge Heater
A DC cartridge heater plays a critical role in compact and precise heating applications. It delivers controlled, localized heat directly to solid metal parts, plastic molds, or metal dies. Built for reliability and efficiency, the 12-volt variant is especially suited for small-scale or mobile operations where AC power is unavailable or unsuitable. When 12V DC power is applied, electrical energy flows through the resistance coil, converting to thermal energy due to the Joule heating effect (I²R losses). The generated heat transfers outward through the magnesium oxide (MgO) insulation to the metal sheath, and then into the surrounding solid medium via conduction. The design ensures rapid heat-up times and consistent surface temperatures, typically ranging between 100°C to 800°C depending on the watt density and thermal load. Key technical characteristics: Voltage rating: 12V DC, compatible with battery packs and solar-powered systems Wattage: Typically ranges from 25W to 250W for small-diameter heaters (e.g., 6.5mm to 12.5mm) Watt density: Can reach up to 50–100 W/cm² depending on the application and material fit Tolerance: Diameters are precision-ground to +0.02/-0.00 mm for optimal bore fit Sheath materials: Commonly 304 or 316 stainless steel for thermal stability and corrosion resistance Insulation resistance: >100 MΩ at 500VDC, ensuring electrical isolation Leakage current: Typically under 0.5 mA at operating voltage Key Applications of a 12 Volt DC Cartridge Heater Industries rely on DC cartridge heaters for several critical applications, including: 3D printing – maintaining consistent nozzle temperature Medical devices – precise heating in sterilization tools or diagnostic equipment Automotive – heating fluids, battery enclosures, or dies in low-voltage systems Battery-powered machinery – such as drones or mobile soldering tools Portable scientific instruments – where AC power isn’t practical Each application requires consistent, localized heat that a 12V DC cartridge heater delivers without thermal overshoot. Why Choose a 12 Volt Configuration? The 12-volt rating isn’t arbitrary. It directly aligns with low-voltage system demands: Safe for use with battery-powered devices Compatible with solar-based or off-grid systems Reduces risk of electrical hazards in mobile setups Provides precise thermal control without overloading small circuits Ideal for environments where AC power introduces interference While the heat output depends on watt density and sheath material, a 12V DC cartridge heater offers efficient energy transfer at a manageable power load. Construction That Supports Precision Heating The internal structure directly affects performance. Most heaters include: High-resistance coil wound for uniform heat distribution Ceramic or magnesium oxide (MgO) insulation for heat retention and electrical isolation Stainless steel sheath for corrosion resistance and thermal conduction Lead wires insulated with fiberglass or Teflon for high-heat environments This construction ensures long life, efficient heat transfer, and safe operation even under demanding conditions. Performance Factors That Matter Several parameters influence how well a 12V DC cartridge heater performs: Watt Density – heat output per square inch; higher densities heat faster but need tighter control Insertion Fit – close tolerance between heater and bore enhances conduction Material Type – metal types like aluminum or steel absorb heat at different rates Control Systems – pairing with thermostats or PID controllers ensures accuracy Selecting the correct heater means understanding both thermal needs and electrical constraints. Final Thoughts In summary, a 12-volt DC cartridge heater functions as a precision thermal component for energy-efficient, low-voltage systems that require controlled, focused heat in restricted spaces. It integrates seamlessly with modern compact equipment, delivering consistent performance with minimal power draw.
What to Select a Cartridge Heater For CO2 Heater
When working with CO₂ systems, heat control isn’t optional; it’s essential. Poor heat management leads to pressure drops, inefficiency, and inconsistent gas flow. That’s why selecting the right cartridge heater for CO2 heater applications is more than a routine task. It impacts productivity, safety, and system performance. Not all cartridge heaters are suitable for handling CO₂. Each feature must match the system’s technical demands. Let’s break down exactly what to look for so your CO₂ heating setup performs reliably, safely, and efficiently. Understand the Role of a Cartridge Heater in CO₂ Systems CO₂ is commonly stored and transported as a liquid. To use it as a gas, it must be heated beyond its critical point (around 31°C or 87.8°F). This is where a cartridge heater for CO2 heater becomes critical. It converts electrical energy into thermal energy, allowing controlled vaporization and maintaining consistent gas pressure. Without proper heating, you risk: Flash freezing in nozzles System pressure drops Inconsistent gas output Equipment stress and failure Now, let’s break down the key criteria you need to consider when selecting the right cartridge heater. 1. Material Compatibility Your heater must withstand direct exposure to CO₂ and its operating conditions. CO₂ is non-corrosive, but moisture presence can form carbonic acid. Choose materials like: Stainless steel (304 or 316) for sheath construction Nickel-chromium resistance wire for core heating Ceramic insulation for heat resistance and electrical safety These materials enhance durability, reduce corrosion risk, and provide consistent heat transfer. 2. Watt Density Control Watt density (watts per square inch of heater surface) determines how fast the heater transfers energy. For CO₂ systems: Low to medium watt density (20–40 W/in²) is ideal Prevents localized overheating Avoids carbon buildup or heater burnout This is especially important when the heater operates inside a tight space with limited airflow. 3. Precision Temperature Control Temperature swings can create pressure instability in CO₂ systems. You need a heater that supports accurate, responsive control. Look for: Integrated thermocouples (J or K type) PID controllers Over-temperature protection These features allow real-time feedback, helping maintain steady output and protecting the heater from thermal stress. 4. Dimensional Accuracy and Fit Most CO₂ heating setups include small-diameter tubes or chambers. A poor heater fit reduces efficiency and can damage the chamber walls. Check for: Tight tolerances (±0.001 inch) Custom lengths and diameters (typically 1/8” to 1”) Compression fitting compatibility This ensures optimal heat transfer and minimizes thermal losses. 5. Environmental and Safety Ratings CO₂ heaters often run in sensitive environments—labs, food-grade settings, or medical systems. Compliance matters. Ensure the heater has: UL or CE certification Moisture resistance (IP65 or higher) Leak-proof construction Grounding provisions These specs protect the user and system from electrical risks or performance loss due to condensation. 6. Voltage and Power Specifications Your cartridge heater for CO2 heater must match your power supply. CO₂ vaporization varies with the flow rate and ambient temperature. Standard specs to look for: 12V, 24V, 120V, or 240V input options Power rating between 50W–500W depending on usage Fast ramp-up times (<60 seconds to reach working temp) Choose power levels that support your application without overshooting the heat curve. 7. Mounting and Replacement Ease Downtime hurts productivity. Choose a heater that’s easy to install and replace without complex tools. Look for: Threaded or flanged options Quick-disconnect wiring Anti-seize coating for easy removal These small design details prevent long-term frustration and reduce service costs. Final Word A high-performance cartridge heater for CO2 heater isn’t just about generating heat. It’s about maintaining system stability, ensuring safety, and keeping your CO₂ process efficient. Whether you’re in industrial gas delivery, extraction systems, or lab automation, the right cartridge heater delivers consistent performance where it counts. Match specifications to your exact CO₂ setup. Focus on material quality, thermal control, watt density, and safety features. And always choose a heater that aligns with your system’s power and dimensional requirements. This level of detail keeps your CO₂ applications running smoothly—day in, day out.
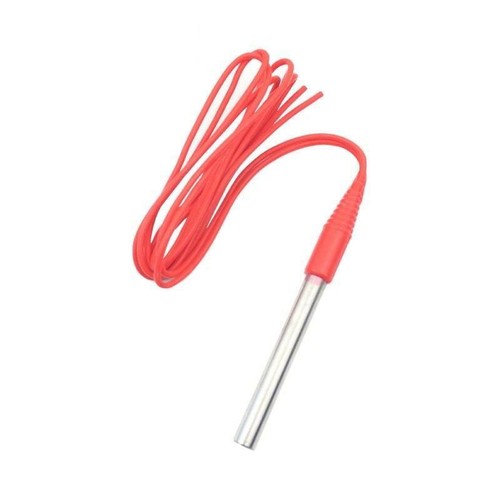
What is a Heater For 3D Printer A Quick Guide
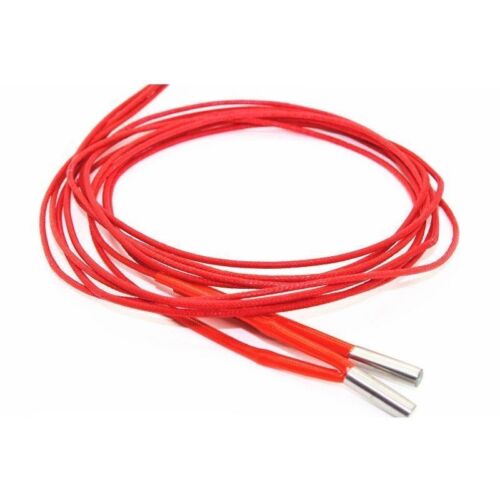
Precision printing depends on consistent temperatures. Without a reliable heat source, even the most advanced 3D printers fail to produce quality results. That’s where a cartridge heater for 3D printer comes in, a core component behind accurate, high-quality filament extrusion. Most users don’t realize how critical this small device is to maintaining performance and preventing failures. Whether you’re using PLA or high-temperature materials like ABS or Nylon, the heater ensures optimal flow through the hotend. Here’s everything you need to know to choose the right one, avoid underperformance, and extend your printer’s life. What is a Cartridge Heater for 3D Printer? A cartridge heater for 3D printer is a compact heating element embedded in the hotend. It heats the nozzle to the precise temperature needed to melt thermoplastic filament. Unlike open coil heaters, cartridge heaters offer better insulation, faster heating times, and focused thermal transfer. These heaters are cylindrical, stainless steel-clad components filled with magnesium oxide insulation and resistance wire. They are designed to withstand continuous high temperatures and fit snugly into the hotend block. Their tight fit ensures maximum heat transfer. Why It Matters in 3D Printing Temperature fluctuation causes weak prints, clogged nozzles, and inconsistent layer adhesion. A properly functioning cartridge heater for 3D printer prevents: Under-extrusion, which results from a heater not reaching or maintaining set temperature. Thermal runaway which can damage your printer or even pose safety risks. Material incompatibility, especially with high-temp filaments like PC or Nylon. Without stable heat control, even calibrated printers will struggle with warping and layer delamination. Key Features to Look For Not all cartridge heaters are equal. Selecting the right one means better performance and longer lifespan. Here are essential factors to consider: Wattage: Standard printers work well with 30W or 40W heaters. However, for high-temp filaments, a 50W heater may be required. Higher wattage provides faster heat-up times and better temperature stability. Voltage: Match the heater’s voltage rating to your printer’s power supply—typically 12V or 24V. A mismatch can cause power issues or failure to reach temperature. Diameter and Length: Most hotends require a 6mm diameter heater, with lengths varying between 20mm and 30mm. Confirm compatibility with your hotend block before purchasing. Leads: Look for high-temperature silicone or fiberglass-insulated wires. Poor insulation leads to short circuits or wire degradation. Sensor compatibility: Some heaters come bundled with thermistors or are designed to work closely with specific temperature sensors. This ensures accurate heat regulation. When to Replace Your Cartridge Heater Over time, heaters degrade. Resistance wires oxidize, insulation wears, and heating becomes unreliable. Common signs you need a replacement include: Slow heat-up times Failure to reach or hold the target temperature Repeated thermal errors during prints Visible wear on wires or casing If your print quality suddenly drops or your printer frequently throws errors, don’t overlook the heater. Replacing it early prevents damage to the hotend or mainboard. Best Practices for Installation Improper installation can reduce efficiency or cause heater failure. Follow these guidelines: Clean the hotend block before inserting the heater. Any debris can reduce thermal contact. Apply thermal paste (if recommended) for improved heat transfer. Secure the heater firmly with a grub screw or clamp, ensuring it doesn’t slide during operation. Avoid bending heater wires sharply near the metal casing. This weakens the internal connection. Perform a PID tune after installing a new heater to optimize temperature control. Which Materials Require Stronger Heaters? Different filaments need different temperatures: PLA: 180°C to 210°C – standard heaters suffice. ABS: 230°C to 250°C – benefit from stable heat, especially with enclosed printers. PETG: 230°C to 250°C – requires consistent heating for smooth extrusion. Nylon, Polycarbonate, PEI: 260°C to 300°C – demand a high-watt cartridge heater for 3D printer with robust insulation. Printing exotic materials? Invest in an all-metal hotend and a 50W or 60W cartridge heater to handle extreme temps without failure. Final Thoughts The cartridge heater for 3D printer may seem small, but its impact is massive. A high-quality heater ensures consistent extrusion, reliable temperature control, and better print finishes. It also protects your investment by preventing hotend damage and thermal errors. Whether you’re replacing a worn-out unit or upgrading for high-performance printing, choosing the right heater is essential for dependable results. Always verify compatibility and never compromise on build quality.
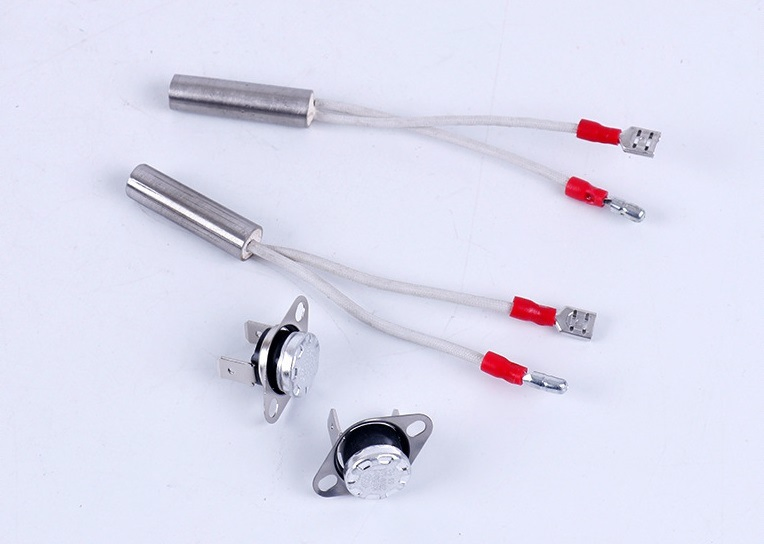
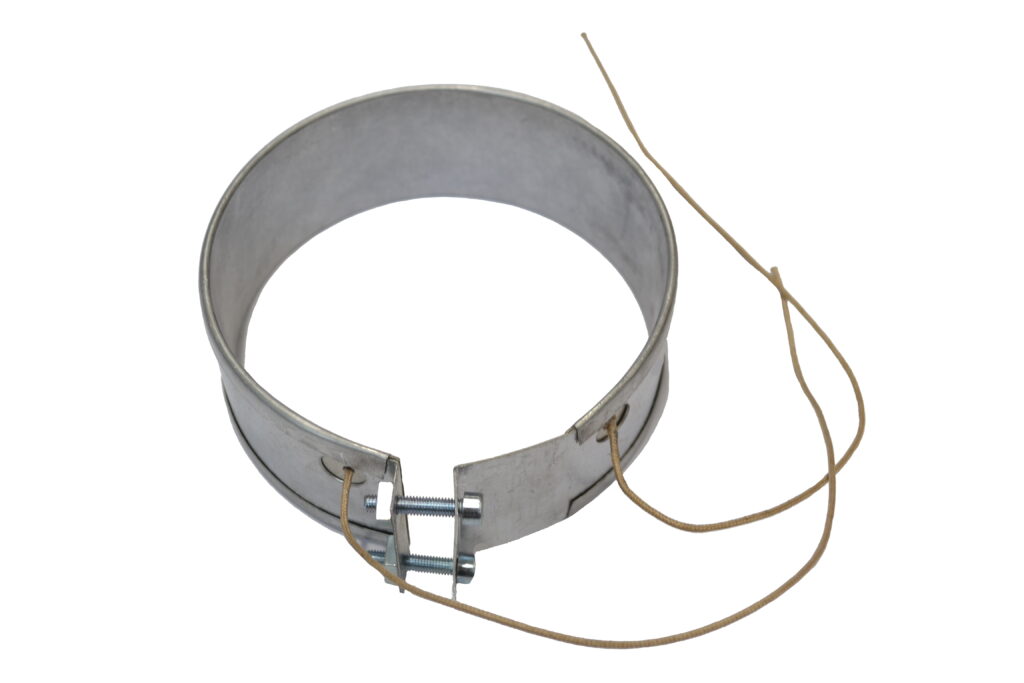
What is Band Heater With Thermocouple
Industrial heating demands precision. Whether it’s plastic injection molding or extrusion, maintaining the correct temperature is critical. That’s where a band heater with thermocouple steps in, delivering both heat and accurate temperature monitoring in one solution. Manufacturers face tight tolerances. A few degrees off can ruin an entire production batch. The integration of a thermocouple into the band heater ensures consistent thermal control, directly where it’s needed most. Understanding the Band Heater A band heater is a cylindrical heating element. It’s typically clamped around pipes, barrels, or nozzles. It’s used to heat metal surfaces directly, offering fast and even thermal distribution. Most are made of stainless steel and nickel-chromium resistance wire. These heaters are often seen in: Plastic processing equipment Pharmaceutical manufacturing Chemical reactors Food production machinery The band heater wraps tightly around the component, minimizing heat loss and enhancing efficiency. The Thermocouple Advantage A thermocouple is a sensor that measures temperature based on the voltage difference between two dissimilar metals. It converts heat into an electrical signal, feeding real-time data to controllers or monitoring systems. When embedded into a band heater, it enables: Accurate, real-time temperature readings Faster feedback for thermal control systems Reduced risk of overheating Longer heater lifespan due to better regulation This combination eliminates the guesswork. It’s not just heating; it’s intelligent heating. Types of Band Heaters With Thermocouples The design and material choice depend on the application. Here are the most common options: Mica Band Heaters: Cost-effective and offer up to 900°F operating temperatures. Ideal for general-purpose heating. Ceramic Band Heaters: Handle up to 1,400°F. Provide superior heat retention and energy efficiency. Mineral-Insulated Band Heaters: Compact, high-watt density, and extremely durable. Preferred for space-constrained setups. Thermocouple types often used: Type J: Iron-Constantan. Effective from 0°C to 750°C. Affordable and accurate for lower temperature ranges. Type K: Chromel-Alumel. Suitable up to 1,260°C. Common in industrial environments. Type E and Type T: Used in niche applications for specific temperature sensitivities. Why Industries Prefer Band Heater With Thermocouple The rise in automation and real-time monitoring has made traditional heaters obsolete in many contexts. A band heater with thermocouple delivers measurable advantages: Precise thermal control: Ensures consistent output quality Energy savings: Less energy wasted due to overheating Operational safety: Reduces fire and breakdown risks Improved productivity: Cuts downtime by eliminating thermal fluctuation errors It also reduces the need for external sensors, cutting wiring and simplifying control panel design. Best Practices for Installation To gain full value from a band heater with thermocouple, install it correctly. Follow these guidelines: Surface preparation: Ensure the contact area is clean, smooth, and free of debris. Uniform clamping: Apply even pressure to prevent air gaps. Thermocouple positioning: Place it where the temperature fluctuates the most, often at the hottest point. Regular checks: Inspect connections and resistance values during maintenance cycles. Avoid overheating: Match heater wattage with the material’s heat absorption rate. . How to Choose the Right Band Heater With Thermocouple Not all heaters are created equal. When selecting a model, consider the following: Temperature range requirements Material to be heated Power needs (watt density) Space limitations Mounting options Required thermocouple type Also, check the insulation type and terminal style. Poor selection leads to uneven heating or short service life. Final Thoughts Precision matters more than ever. A band heater with thermocouple isn’t just a tool it’s an investment in accuracy, consistency, and safety. From energy efficiency to real-time monitoring, it supports scalable, high-quality production. Manufacturers relying on thermal accuracy can’t afford to guess. By integrating sensing and heating into one cohesive unit, this solution meets the rising demands of modern industry, one degree at a time.
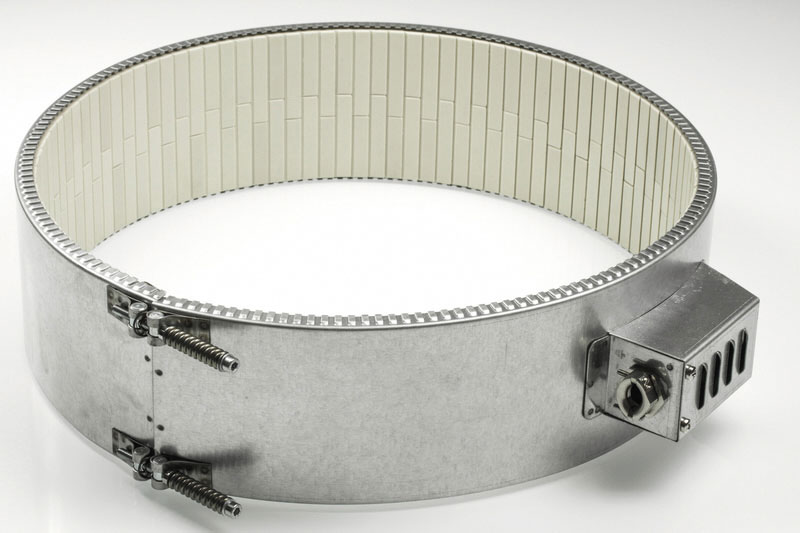
What is a Ceramic Pad Heating Element

The ceramic heating pad isn’t just another heating element, it’s engineered for precision. Designed to deliver uniform, high-temperature heat in industrial and laboratory environments, this heating solution is trusted for its efficiency and stability under extreme conditions. Let’s break down what makes the ceramic heating pad essential across several industries. What is a Ceramic Pad Heating Element? A ceramic heating pad is a flexible, high-temperature heating element made from interlocking ceramic beads. These beads surround resistance wires—typically made from nickel-chromium alloys that generate heat when electric current passes through. The entire structure is rugged, bendable, and capable of withstanding temperatures up to 2050°F (1120°C). This design makes it suitable for heating curved surfaces, cylindrical components, and hard-to-reach areas. How It Works At the core of a ceramic heating pad is resistive heating. When power flows through the wire, the resistance converts electrical energy into thermal energy. The ceramic beads conduct this heat and provide insulation, ensuring efficient and uniform distribution. This mechanism makes it ideal for applications like: Preheating metal before welding Stress-relieving welded joints Post-weld heat treatment (PWHT) Drying pipelines or tanks Each pad can be tailored for different voltages, watt densities, and configurations based on the application. Key Benefits of Ceramic Heating Pads Here’s why engineers and technicians prefer ceramic heating pads over other industrial heating methods: Extreme heat tolerance: Withstand continuous heat up to 2050°F (1120°C) Uniform heat distribution: Prevents thermal stress and uneven expansion Flexibility: Easily conforms to complex or curved surfaces Durability: Designed for repeated industrial use in harsh environments Portability: Can be wrapped, clamped, or positioned as needed Modular design: Scalable for larger applications by combining multiple pads Applications Across Industries The demand for ceramic heating pad technology spans across sectors that require consistent and controllable heat: 1. Welding and Fabrication Preheating steel reduces the risk of cracking during welding Post-weld heat treatment (PWHT) reduces internal stresses Ideal for pipelines, pressure vessels, and structural steel 2. Petrochemical and Oil & Gas Pipe drying and tank heating during maintenance Ensures the right temperature for coatings and curing 3. Aerospace and Defense Heat treatment of aircraft components and critical joints Reduces the risk of material fatigue 4. Power Generation Used in turbine maintenance, boiler repairs, and pressure vessels Supports strict temperature requirements during stress relief 5. Shipbuilding and Marine Effective for heating hulls and piping systems Suitable for corrosive or moisture-heavy environments Choosing the Right Ceramic Heating Pad Selecting the appropriate ceramic heating pad depends on several key factors: Target temperature: Make sure the pad’s rating meets or exceeds your application’s thermal requirement. Watt density: Higher watt density gives quicker heat-up time but can stress certain materials. Pad dimensions: Must match the geometry of the surface for consistent heating. Voltage requirement: Pads are often custom-designed for 120V, 240V, or 480V systems. Control system compatibility: Use with a programmable controller for precision heating. If these parameters are misaligned, the heating result will be uneven, and the material might not reach optimal treatment levels. Advancements in 2024 Technology Modern ceramic heating pads have evolved significantly in the past year. The latest versions include: Digital temperature control integration Improved insulation for higher energy efficiency Modular pads with quick-connect fittings These enhancements minimize downtime and improve worker safety by eliminating the need for direct contact during temperature adjustments. Maintenance and Safety Tips To keep your ceramic heating pad functioning reliably: Inspect before each use: Check for broken ceramic beads or frayed wires. Store properly: Avoid kinks or tangling to preserve the resistance wire. Use approved controllers: Prevent overheating or electrical issues. Follow the correct temperature ramp-up procedures: Avoid thermal shock. Final Thoughts The ceramic heating pad is a powerful and reliable heating solution, built to perform under demanding conditions. Its ability to deliver uniform, high-temperature heat while adapting to complex surfaces makes it a cornerstone in industries that depend on precision and control. For engineers, fabricators, and industrial maintenance professionals, understanding how and when to apply this heating method is critical to project success.
How to Sell Flat Ceramic Band Heaters Online

Industrial buyers are actively seeking heating solutions that deliver durability, energy efficiency, and precision. Flat ceramic band heaters meet these requirements, making them a sought-after product in sectors like plastics, packaging, pharmaceuticals, and food processing. For sellers, this presents a significant opportunity to tap into a growing market. Understand the Market Dynamics The global ceramic band heater market is projected to expand from USD 1.5 billion in 2024 to USD 2.3 billion by 2033, growing at a CAGR of 5.2%. This growth is driven by the increasing demand for energy-efficient and high-performance heating solutions across various industries. Highlight Key Product Features When marketing flat ceramic band heaters, emphasize the following features: High-Temperature Capability: Operate efficiently at temperatures up to 1200°F, suitable for high-intensity applications . Energy Efficiency: Advanced ceramic insulation minimizes energy loss, reducing operational costs. Durability: Constructed with premium-grade ceramics and metals to withstand extreme operating conditions. Custom Sizing: Tailored options allow seamless integration into existing machinery. Versatility: Applicable across industries such as plastics, packaging, pharmaceuticals, and food processing. Optimize Your Online Presence To effectively sell flat ceramic band heaters online, consider the following strategies: 1. SEO Optimization Keyword Integration: Incorporate relevant keywords like “flat ceramic band heaters,” “industrial heating solutions,” and “energy-efficient band heaters” throughout your website content. Meta Descriptions and Titles: Craft compelling meta descriptions and titles that include target keywords to improve search engine visibility. 2. High-Quality Visuals Product Images: Provide clear, high-resolution images showcasing the heaters from multiple angles. Application Photos: Include images demonstrating the heaters in real-world industrial settings to illustrate their practicality. 3. Detailed Product Descriptions Technical Specifications: List detailed specifications, including dimensions, voltage, wattage, and temperature range. Usage Scenarios: Describe specific applications and industries where the heaters are most effective. 4. Customer Testimonials and Case Studies Testimonials: Feature reviews from satisfied customers to build trust and credibility. Case Studies: Present detailed accounts of how your heaters have improved efficiency or reduced costs for clients. Leverage Digital Marketing Channels Expand your reach and attract potential buyers through various digital marketing avenues: Email Marketing: Send newsletters highlighting new products, special offers, and industry insights. Social Media: Share informative content, product updates, and customer success stories on platforms like LinkedIn and Facebook. Pay-Per-Click Advertising: Invest in targeted ads to appear in search results for relevant queries. Offer Exceptional Customer Support Providing excellent customer service can set you apart from competitors: Responsive Communication: Ensure prompt responses to inquiries and provide detailed information as needed. Technical Assistance: Offer guidance on product selection, installation, and maintenance. After-Sales Support: Maintain ongoing communication to address any post-purchase concerns or needs. Final Thoughts Selling flat ceramic band heaters online requires a strategic approach that combines product knowledge, effective marketing, and exceptional customer service. By understanding market trends, highlighting key product features, optimizing your online presence, leveraging digital marketing channels, and offering outstanding support, you can successfully reach and retain industrial buyers seeking reliable heating solutions.
How to Evaluate The Best Electric Drum Heater
Choosing the best electric drum heater isn’t just about price or brand recognition. It’s about performance, safety, energy efficiency, and the ability to maintain consistent temperatures for specific materials. Whether you’re handling industrial chemicals, food-grade materials, or oils, the wrong heater can lead to waste, downtime, or safety hazards. That’s why evaluating the right model requires careful attention to several technical and practical factors. Identify Drum Material Compatibility Not every electric drum heater is suitable for every drum type. Most drums are made of either plastic or metal, and the heater must match the thermal tolerance and conductivity of the drum material. For metal drums, silicone band heaters or full-coverage jackets are ideal due to metal’s high thermal conductivity. For plastic drums, use heaters with lower surface temperatures to prevent deformation or damage. Always check the heater’s compatibility label or technical datasheet. Analyze Heating Method Efficiency The heating method impacts both energy usage and temperature uniformity. The common types include: Band heaters: Wrap around the drum and provide direct contact heating. Best for localized heat. Insulated drum jackets: Offer even heat distribution and reduce energy loss. Drum base heaters: Heat from below and are useful for high-viscosity materials that settle. Look for models that combine insulation with thermostatic control to prevent overheating and reduce energy consumption. Temperature Control Precision Temperature control is critical for sensitive contents. Poor regulation can cause scorching, spoilage, or chemical breakdown. Prioritize heaters with: Digital thermostats: Offer precise temperature readings and programmable settings. Built-in sensors: Automatically adjust heat to maintain stability. Overheat protection: Prevents temperature spikes that could damage contents or drums. Evaluate Watt Density Watt density refers to the amount of power per square inch of heating surface. A lower watt density provides gentler, safer heating for delicate materials. A higher density delivers faster heating but may require better control mechanisms. Low watt density (≤10 W/in²): Suitable for flammable or temperature-sensitive contents. Medium to high watt density (10–30 W/in²): Effective for thicker oils or industrial greases. Safety Certifications and Compliance An effective electric drum heater must meet industry safety standards. Look for: UL, CSA, or CE certification: Confirms electrical safety. NEMA-rated enclosures: Protects from dust, water, or chemicals. Explosion-proof models: Required in hazardous material environments. Energy Consumption and Insulation A poorly insulated drum heater will waste energy and take longer to reach the target temperature. Focus on models that: Include thermal blankets or full jackets. Use closed-cell foam insulation to retain heat. Have automatic shutoff features when optimal heat is reached. Installation and Portability Some heaters require complex mounting or permanent installation, while others are designed for fast setup. Flexible silicone heaters are lightweight and easy to wrap. Rigid metal base heaters may need permanent placement but offer consistent bottom-up heating. Compatibility with Drum Sizes Check if the electric drum heater supports your drum’s volume: 55-gallon models are most common, but smaller (15–30 gallon) and larger (85+ gallon) options exist. Adjustable straps or tensioners help fit different sizes securely. Always match the heater’s rated capacity with your drum’s exact volume. Maintenance Requirements Maintenance affects long-term reliability. Select models that: Allow easy access to thermostats and wiring. Come with replaceable heating elements. Include LED indicators for error alerts or power status. Total Cost of Ownership Don’t focus solely on upfront cost. Assess: Energy efficiency Durability under continuous operation Warranty coverage Availability of replacement parts Final Thoughts When choosing the best electric drum heater, align your decision with material type, safety, temperature needs, and energy usage. Each feature should serve a specific function tied to your process. This technical approach ensures safety, efficiency, and long-term value without costly mistakes.
Top 5 Industries That Use Stainless Steel Strip Heater with Thermostat
Precision heating is critical in several industrial applications. The stainless steel strip heater with thermostat is a top solution for delivering uniform, controlled heat in compact spaces. Designed for rugged environments, it provides reliability, efficiency, and temperature accuracy. With thermostatic control, it ensures minimal energy waste while maintaining consistent heat. Below are five industries where this heater is essential to operations. 1. Plastics Manufacturing Temperature consistency is vital in plastic forming, bending, and extrusion. A stainless steel strip heater with thermostat ensures the heat remains within tight parameters to avoid material deformation or defects. Why it matters: Maintains mold temperature for consistent product quality Prevents overheating during plastic sheet bending Reduces scrap rates in thermoforming processes Ideal for platen and die heating in extrusion setups Thermostatic control reduces downtime from overheating and equipment failure. With high thermal conductivity, stainless steel allows faster heat-up times. 2. Food Processing The food industry demands strict compliance with hygiene and safety standards. Stainless steel’s corrosion resistance and sanitary surface make it ideal. A stainless steel strip heater with thermostat offers precise heating for cooking surfaces, sealing systems, and food warming equipment. Key uses: Heat sealing machines in packaging lines Holding tanks for sauces and oils Warming trays and food holding equipment Conveyor belt warming to prevent food sticking Stainless steel construction meets FDA and USDA regulations, and thermostatic controls help maintain food-safe temperatures without manual adjustment. 3. Pharmaceutical Manufacturing In pharmaceutical production, heating requirements must align with GMP standards. Cleanroom environments depend on durable equipment that withstands sanitization while maintaining thermal performance. Applications include: Heating jacketed vessels Maintaining water bath temperatures Sterilization equipment heating Laboratory drying ovens Stainless steel strip heaters with thermostat deliver uniform thermal regulation for sensitive ingredients and lab processes. Their corrosion resistance makes them suitable for aggressive cleaning agents. 4. Semiconductor Fabrication Microelectronic manufacturing needs pinpoint thermal control to protect wafer quality. A stainless steel strip heater with thermostat prevents overheating and material damage during processes like wafer bonding, chemical vapor deposition, and photoresist baking. Key advantages: Stable, controlled temperature distribution Thin profile allows placement in tight chambers Thermostatic control prevents thermal overshoot Withstands high-purity environments Its compact design supports integration into equipment where space and temperature precision are non-negotiable. 5. HVAC and Ducting Systems HVAC systems rely on strip heaters to regulate airflow temperature and prevent condensation. A stainless steel strip heater with thermostat offers dependable heating for ducts, vents, and air handlers in residential, commercial, and industrial settings. Typical uses: Preheating air in makeup air units Freeze protection in ductwork Heating coils in fan-powered terminal units Electric duct heaters in ventilation systems Thermostatic accuracy ensures optimal energy use while maintaining indoor climate stability. Stainless steel’s strength resists wear in high-velocity airflow. Final Takeaway Each of these five industries relies on the stainless steel strip heater with thermostat to meet strict performance and compliance standards. Its combination of temperature control, durability, and compact form makes it essential in operations where failure is not an option. From cleanroom environments to high-speed packaging lines, this heating solution supports production goals with reliability and efficiency.
How to Use Band Heater For Tanks
Precision heating is non-negotiable when handling temperature-sensitive liquids. A band heater manufacturer plays a critical role in this by supplying solutions tailored for industrial tanks. Band heaters apply consistent heat across the tank’s surface, ensuring product integrity without thermal gradients. But using one correctly requires more than just wrapping it around a vessel. Here’s how to use a band heater for tanks effectively, based on technical guidelines and real-world application data. Understand the Purpose of Band Heaters Band heaters are designed to: Maintain fluid viscosity in resins, oils, or chemicals Prevent freezing in cold environments Raise process temperature for reactivity or flow control Before choosing a heater, determine the tank material, volume, fluid type, and ambient temperature. Different materials like stainless steel or poly tanks conduct heat differently, which directly affects heater efficiency. Choose the Right Band Heater Type A reputable band heater manufacturer offers several models. Each type fits specific use cases: Mica insulated heaters – Ideal for low- to medium-temperature applications (up to 900°F). Cost-effective and commonly used. Ceramic band heaters – Better for high temperatures (up to 1200°F) and energy efficiency. They reduce heat loss via insulation. Mineral-insulated heaters – Provide the highest watt densities and fastest heat-up times. Measure Correctly Improper sizing is a common mistake. Measure the outside diameter of the tank accurately. Also, measure the height of the area to be heated. Band heaters come in custom sizes and are often manufactured per order. Install the Band Heater Securely Follow these steps: Wrap the heater tightly around the tank. Tighten the clamping mechanism (usually a strap or barrel nut) evenly to avoid air gaps. For ceramic types, preheat slightly before tightening if required. This prevents cracking. Check all electrical connections before energizing the heater. Apply Proper Thermal Insulation Most heat loss occurs through radiation and convection. Adding insulation over the heater: Increases efficiency Reduces power consumption Protects personnel from burns Use high-temperature blankets or fiberglass wraps approved for the heater’s rated temperature. Control the Temperature Accurately Don’t rely on guesswork. Install a thermocouple or RTD sensor near the heating zone. Connect it to a PID temperature controller to automate and regulate heat delivery. Smart controllers can also log data and detect system faults. Safety Precautions Matter Working with electrical heaters requires discipline: Use ground-fault circuit interrupters (GFCI) Ensure proper grounding of the heater Install over-temperature protection systems Regularly inspect for wear or exposed wiring Maintenance Checklist A well-maintained heater performs longer and more efficiently: Inspect clamping tightness every 30–60 days Check electrical terminals for corrosion or looseness Clean debris from the heater and the surrounding insulation Replace worn components from the same band heater manufacturer for compatibility Common Mistakes to Avoid Using the wrong watt density for plastic tanks (risk of melting) Leaving air gaps under the band Skipping thermal control Running heaters dry (no product in the tank) Why Work With a Trusted Band Heater Manufacturer Every top band heater manufacturer, like Cheri Heater, offers: Engineering consultation Custom-fit designs Certified safety standards Long-term technical support This ensures that your heater matches your exact tank specs and process needs. Final Thoughts Using a band heater for tanks is not just about applying heat. It’s about precision, safety, and efficiency. Start by choosing the right heater type, size it properly, and pair it with a smart control system. Regular maintenance and working with a trusted band heater manufacturer are what separate reliable performance from premature failure.