
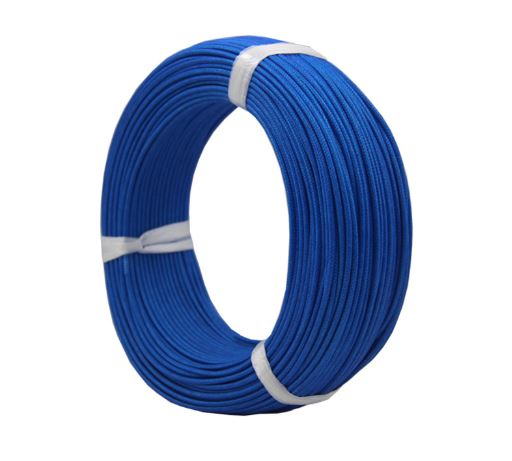
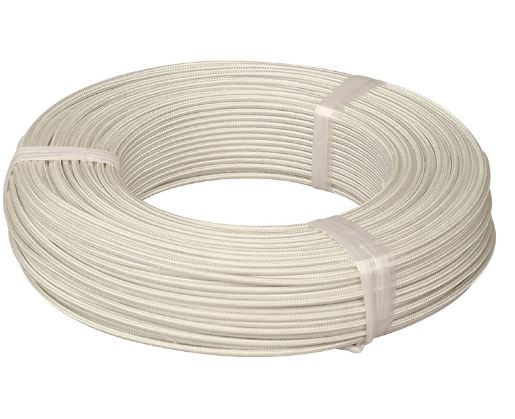
What are The Types of Cable Sleeves
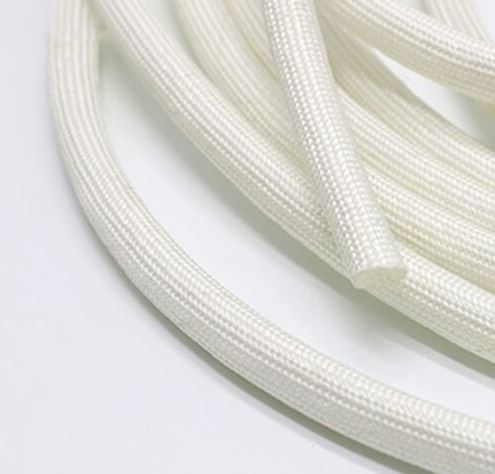
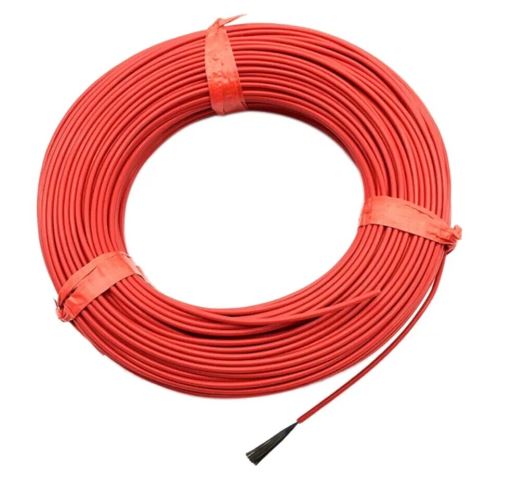
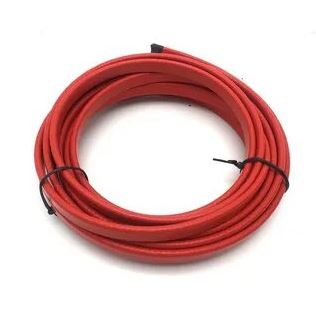
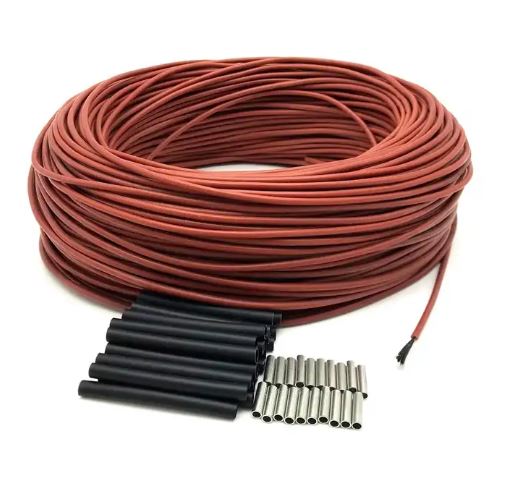
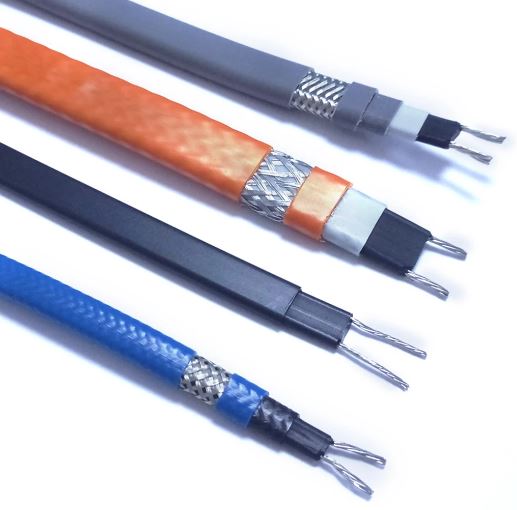
When it comes to managing wires and cables efficiently, high temperature cable sleeves manufacturers play a crucial role. Cable sleeves are essential for organizing, protecting, and ensuring the safety of cables in various environments. They come in different types, each serving specific purposes, and choosing the right one can make a big difference in performance and durability. In this post, we will explore the different types of cable sleeves, their features, and their applications. What Are Cable Sleeves? Cable sleeves are coverings designed to bundle and protect cables from external damage. They shield wires from heat, abrasion, chemicals, and moisture. This helps improve safety and enhances the lifespan of cables. Why Are Cable Sleeves Important? Cable sleeves are not just for appearance. They prevent accidents, reduce wear and tear, and improve efficiency. Here’s why they are critical: Protection from heat and chemicals: Prevents melting or damage from extreme conditions. Organization: Keeps cables neat and accessible for maintenance. Improved safety: Reduces risks of electrical fires and hazards. Durability: Extends the life of cables by reducing environmental stress. Types of Cable Sleeves Here’s an in-depth look at the most common types of cable sleeves: 1. Braided Cable Sleeves Braided sleeves are flexible and durable. They are woven with strong fibers that expand or contract to fit over cables. Key Features: Resistant to abrasion and chemicals. Allows airflow, preventing overheating. Can be used in industrial, automotive, and home settings. Common Materials: Nylon, polyester, or stainless steel. Applications: Ideal for bundling wires in computers, appliances, and heavy machinery. 2. Heat-Shrink Sleeves Heat-shrink sleeves are tubes that shrink when heated, forming a tight fit around cables. Key Features: Provides a secure and waterproof seal. Protects against moisture and corrosion. Available in different sizes and colors for easy identification. Common Materials: Polyolefin and fluoropolymer. Applications: Widely used in electronics, automotive wiring, and electrical repairs. 3. Spiral Wrap Sleeves These are coiled sleeves that wrap around cables, providing flexibility and access to individual wires. Key Features: Easy to install and remove. Allows branching out of cables at any point. Lightweight and reusable. Common Materials: Polyethylene or nylon. Applications: Suitable for home offices, telecommunications, and automation systems. 4. Split Loom Sleeves Split loom sleeves have a split design for easy installation over existing cables. Key Features: Protects against abrasion and UV rays. Flexible and lightweight. Allows quick access for maintenance. Common Materials: Polyethylene and polypropylene. Applications: Commonly used in automotive wiring and industrial equipment. 5. Fiberglass Sleeves Fiberglass sleeves are designed to withstand extreme heat and are often coated for additional protection. Key Features: Can handle temperatures up to 1,200°F. Resistant to chemicals and moisture. Durable in harsh environments. Common Materials: Fiberglass with silicone coating. Applications: Used in high-temperature industries like aerospace, metallurgy, and power plants. 6. Velcro Cable Sleeves Velcro sleeves are simple and reusable, offering a practical way to manage cables without permanent installation. Key Features: Adjustable and easy to reuse. Provides quick cable management. No tools required for installation. Common Materials: Nylon with Velcro strips. Applications: Perfect for home and office setups where cables need regular adjustment. How to Choose the Right Cable Sleeve Selecting the right cable sleeve depends on the application, environment, and type of cables. Consider the following: Temperature Resistance: For high-heat areas, choose fiberglass or heat-shrink sleeves. Flexibility: Use braided or spiral wraps for maximum flexibility. Durability: For outdoor or industrial use, opt for UV-resistant and chemical-proof sleeves. Ease of Installation: Velcro or split loom sleeves are best for quick adjustments. Budget: Match your choice with your budget while ensuring long-term value. Comparison Table for Cable Sleeves Wrap Up Temperature cable sleeves manufacturers provide a variety of solutions to protect and organize cables. From heat-shrink tubes to flexible braided sleeves, there’s a type for every need. Proper cable management ensures safety, extends the lifespan of your equipment, and keeps your workspace tidy. When selecting a cable sleeve, always prioritize the specific requirements of your project to achieve the best results.
Will Fiberglass Resin Stick to Silicone?
Fiberglass resin is a versatile material used in various industries. Silicone, known for its flexibility and heat resistance, is also a popular choice for many applications. But one question often arises: Will fiberglass resin stick to silicone? This is an important consideration, especially when combining materials like silicone fiberglass cable in construction, automotive, or crafts. Let’s explore the compatibility of these materials, how they work together, and what alternatives might be helpful. Understanding Fiberglass Resin and Silicone Before addressing their compatibility, it’s essential to know the properties of each material: Fiberglass Resin: Often made from polyester, vinyl ester, or epoxy. Used as a binding agent for fiberglass fabrics. Hardens to a durable, waterproof layer after curing. Resistant to wear, heat, and chemicals. Silicone: A rubber-like material available in flexible or rigid forms. High resistance to extreme temperatures. Non-stick, water-repellent, and chemically stable. Commonly used in molds, seals, and coatings. Both materials are strong and heat-resistant, making them suitable for demanding environments. However, their inherent properties raise compatibility challenges. The Science of Adhesion Adhesion occurs when two surfaces bond at the molecular level. For this to happen: The surfaces need chemical compatibility. Surface energy and texture play a critical role. Proper preparation is necessary to ensure bonding strength. Silicone has a naturally low surface energy, making it slippery and non-stick. This property is why silicone is excellent for non-stick bakeware or mold-making but also makes bonding with fiberglass resin difficult. Why Fiberglass Resin Does Not Stick to Silicone Fiberglass resin does not bond well to silicone because of these reasons: Non-Stick Surface: Silicone’s surface repels adhesives. Chemical Incompatibility: Fiberglass resins do not chemically react with silicone. Lack of Surface Roughness: Silicone is often smooth, preventing mechanical grip. Even when sanded, silicone retains its low-energy characteristics, resisting most bonding attempts. When Bonding Is Necessary If you need to combine fiberglass resin and silicone, consider these approaches: Use specialized adhesives designed to bond silicone with other materials. Choose silicone-compatible primers to create a bondable surface. Explore mechanical fastening methods like screws or clamps. Alternative Solutions for Bonding If direct bonding is impossible, explore these options: Replace silicone with a material that works well with fiberglass resin, such as rubber or polyurethane. Create a two-part system where the silicone acts as a removable liner or mold, and the fiberglass resin forms the rigid structure. Best Practices for Combining Silicone and Fiberglass Resin If you need to work with both materials in one project, follow these steps: Surface Preparation: Clean the silicone surface thoroughly to remove oils. Sand the surface lightly for added texture (though this may not always help). Use a Primer: Apply a bonding primer specifically designed for silicone. Choose the Right Adhesive: Use adhesives like silicone-based glue or epoxy with added coupling agents. Test Small Areas First: Conduct a test on a small, inconspicuous area to ensure compatibility. Key Differences Between Silicone and Fiberglass Resin Here’s a quick comparison: Wrap Up So, will fiberglass resin stick to silicone? The answer is no. The non-stick nature and chemical properties of silicone prevent fiberglass resin from forming a strong bond. However, with the right preparation, primers, or specialized adhesives, you can work around this limitation. Always test materials before starting a large project, and consider alternatives if bonding proves too challenging.
What is Mica Insulated Cable Used For?
Mica heat proof cable is a game-changer in industries where safety and durability are crucial. These cables are specially designed to withstand extreme conditions, making them ideal for environments with high temperatures, fire risks, and harsh mechanical stress. If you’ve ever wondered why mica is preferred in these cables and where they are used, this blog will give you all the answers. What is a Mica Insulated Cable? Mica is a natural mineral with excellent insulating properties. It can resist extreme heat and does not catch fire easily. Mica insulated cables are built to endure temperatures as high as 1000°C. They consist of mica tape wrapped around conductors to prevent electrical failures. These cables provide high resistance to chemicals, moisture, and abrasion, making them reliable and long-lasting. Why is Mica Used in Heat Proof Cables? Mica has unique qualities that make it perfect for use in heat-resistant cables: Thermal Stability: Mica can withstand extreme heat without breaking down. Dielectric Strength: It acts as an excellent insulator against electrical currents. Fire Resistance: Mica is naturally non-flammable, ensuring maximum safety. Mechanical Strength: It can resist wear and tear in demanding environments. Applications of Mica Insulated Cables Mica insulated cables are essential in industries where extreme conditions exist. Here’s a list of common applications: 1. Fire Protection Systems Mica insulated cables are used in fire alarms, emergency lighting, and smoke detection systems. They maintain their integrity during fires, ensuring critical systems remain operational. 2. Industrial Heating Equipment These cables are ideal for ovens, kilns, and other high-temperature machinery. They ensure efficient and safe power transmission even at temperatures exceeding 900°C. 3. Power Plants Nuclear and thermal power plants rely on mica heat proof cables to handle high heat and electrical loads. They prevent short circuits and equipment failures under extreme conditions. 4. Aerospace and Military Applications Aerospace systems and defense equipment demand reliable, heat-resistant cables. Mica insulated cables can handle the heat and pressure of advanced machinery. 5. Petrochemical Industry Mica insulated cables are used in refineries, gas plants, and chemical facilities. They resist chemical corrosion, heat, and mechanical stress. Advantages of Mica Insulated Cables Mica heat proof cables come with numerous benefits: High Heat Resistance: They function in temperatures beyond most other materials. Fire Safety: These cables do not spread flames, ensuring safety in critical scenarios. Durability: Resistant to moisture, chemicals, and physical damage, they last longer. Electrical Stability: Provide consistent performance under heavy electrical loads. Comparing Mica Insulated Cables to Other Types of Heat Cables How to Choose the Right Mica Insulated Cable When selecting mica insulated cables, consider the following factors: Temperature Range: Ensure the cable can handle the highest temperature in your application. Voltage Requirements: Check the voltage capacity to match your system’s needs. Environmental Conditions: Consider factors like humidity, chemicals, and mechanical stress. Certifications: Look for compliance with safety standards like IEC or UL. Maintenance Tips for Mica Insulated Cables Inspect cables regularly for signs of wear or damage. Keep them away from sharp edges or areas with excessive mechanical stress. Use proper connectors to prevent electrical issues. Store spare cables in a dry, cool place to maintain their quality. Final Words Mica heat proof cable is essential for applications that require exceptional heat resistance and durability. These cables are used in fire protection systems, industrial machinery, power plants, and more. Their reliability and safety features make them a top choice for demanding environments. By choosing the right cable and maintaining it well, you ensure long-term efficiency and protection for your systems.
What is Custom Heat Shrink Cable Labels
Custom heat shrink cable labels are an essential tool for organizing and identifying cables effectively. These labels are designed to shrink tightly around wires when heat is applied, providing a durable and secure solution for cable identification. They are widely used in industries like telecommunications, manufacturing, and electronics, where proper cable management is crucial. Whether you’re dealing with a simple home setup or complex industrial wiring, custom heat shrink cable labels make identifying cables easier and ensure safety. Let’s explore the features, benefits, and applications of in detail. What Are Heat Shrink Cable Labels? Heat shrink cable labels are made from a special type of polymer that shrinks when exposed to heat. This creates a snug fit around cables, ensuring the label stays in place. Here’s what makes them unique: Material: Made from durable and flame-resistant polymers. Design: Available in various colors, sizes, and custom print options. Function: Shrinks up to 50% of its original size to fit securely. Features of Custom Heat Shrink Cable Labels Custom heat shrink cable labels offer several features that make them a preferred choice: Durability: Resistant to abrasion, moisture, and chemicals. Customizable Printing: You can include text, barcodes, or logos. Color Coding: Helps in organizing cables by category or purpose. Flame Resistance: Ensures safety in high-temperature environments. Size Versatility: Available for small and large cables. Benefits of Using Custom Heat Shrink Cable Labels Using these labels provides a range of advantages: Efficient Organization: Keep cables organized, reducing clutter. Improved Safety: Labels prevent misconnection and improve overall wiring safety. Long-Lasting Identification: Resistant to wear and tear, ensuring long-term usability. Easy Installation: Simple application process with a heat gun. Cost-Effective: Minimizes downtime and errors in cable management. Applications of Custom Heat Shrink Cable Labels Custom heat shrink cable labels are versatile and find use in various sectors: Telecommunications: Labeling network and fiber optic cables. Electronics: Marking wires in electronic devices. Automotive: Organizing wiring harnesses. Aerospace: Ensuring accurate identification in complex systems. Industrial Equipment: Labeling power cables in factories. How to Choose the Right Heat Shrink Cable Labels Selecting the right labels depends on your specific needs. Consider these factors: Cable Size: Ensure the label diameter matches the cable size before shrinking. Environment: Choose materials that can withstand your environment (e.g., temperature, moisture). Print Requirements: Opt for labels that support clear and legible printing. Color Preferences: Use different colors for better organization. Step-by-Step Guide to Apply Custom Heat Shrink Cable Labels Follow these steps for easy application: Measure: Select a label slightly larger than your cable diameter. Cut: Trim the label to the required length. Position: Slide the label onto the cable. Shrink: Use a heat gun to evenly shrink the label around the cable. Inspect: Ensure the label is securely in place without bubbles or wrinkles. Maintenance Tips for Heat Shrink Cable Labels To keep your labels effective, follow these tips: Avoid Overheating: Excess heat may damage the label. Clean Before Application: Ensure cables are clean and dry before labeling. Check Regularly: Inspect for wear or fading over time. Store Properly: Keep labels in a cool, dry place for longevity. Why Customization Matters Customization ensures the labels meet your exact needs. With custom heat shrink cable labels, you can include specific details like: Company name for branding. Barcodes for tracking. Unique identifiers for specific projects. Wrap Up Custom heat shrink cable labels are a reliable solution for organizing and identifying cables in various industries. They offer durability, customization options, and ease of use, making them essential for efficient cable management. By choosing the right labels and following proper application techniques, you can ensure your cables are neatly organized and easy to identify, reducing errors and improving safety.
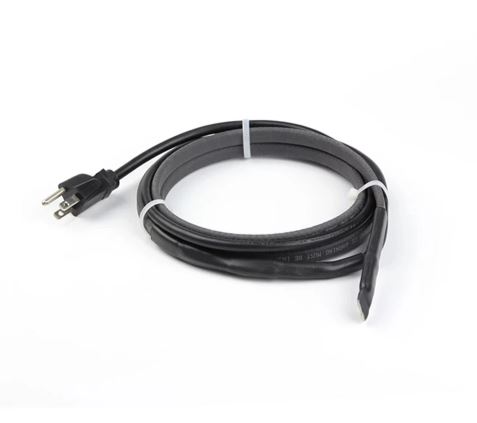
How Does a Water Pipe Freeze Protection Cable Work?
When temperatures drop, frozen pipes can become a costly and inconvenient problem. Anti-freeze heating cables are a practical solution to prevent this. These cables ensure water flows freely in pipes, even in freezing conditions. They work efficiently to protect homes and businesses from damage caused by frozen or burst pipes. But how exactly do they work? Let’s break it down step by step to understand their functionality. What Are Freeze Protection Cables? Freeze protection cables are electric cables designed to heat pipes, preventing freezing. They’re commonly used in areas with harsh winters. These cables are easy to install and work automatically, providing consistent protection for water pipes. Material: Made with durable materials resistant to weather and moisture. Power Source: They plug into standard electrical outlets. Temperature Control: Many cables come with built-in thermostats to activate when temperatures drop below a certain level. How Do Anti-Freeze Heating Cables Work? Freeze protection cables operate by generating heat along their length. The heat is transferred to the pipe, keeping the water inside from freezing. Here’s a detailed breakdown: Electric Current: When plugged in, electricity flows through the cable, generating heat. Thermal Regulation: A thermostat monitors the pipe’s temperature, turning the cable on and off as needed. Heat Transfer: The cable’s heat warms the pipe and surrounding area, maintaining a temperature above freezing. Efficiency: The system only uses energy when temperatures are low, making it cost-effective. Key Features of Freeze Protection Cables Anti-freeze heating cables come with unique features that make them highly effective. Here’s what to look for when choosing one: Self-Regulating Cables: Adjust heat output based on the surrounding temperature, ensuring optimal performance and safety. Length Options: Available in various lengths to suit different pipe sizes. Weatherproof Design: Designed to withstand rain, snow, and extreme cold. Easy Installation: Many cables come with pre-assembled kits for straightforward installation. Installation Process of Freeze Protection Cables Installing freeze protection cables is simple if you follow the right steps. Here’s a quick guide: Choose the Right Cable: Measure your pipe’s length and diameter. Pick a cable suitable for your pipe material (plastic or metal). Clean the Pipe: Remove dirt and debris to ensure good heat transfer. Secure the Cable: Attach the cable to the pipe using heat-resistant tape or zip ties. Wrap it evenly for uniform heating. Insulate the Pipe: Add pipe insulation to retain heat and improve efficiency. Test the System: Plug the cable into a power source and check if it activates when temperatures drop. Advantages of Using Anti-Freeze Heating Cables Investing in freeze protection cables offers multiple benefits: Prevent Frozen Pipes: Avoid expensive repairs caused by burst pipes. Energy-Efficient: Modern cables consume minimal energy, saving money on electricity bills. Automatic Functionality: Thermostats handle temperature adjustments automatically. Protect Water Flow: Ensure consistent water availability during freezing weather. Comparing Self-Regulating and Constant Wattage Cables Tips for Maximizing Cable Performance Use Quality Insulation: Proper insulation reduces energy consumption and keeps pipes warmer. Check Thermostats: Ensure the thermostat functions accurately for reliable operation. Inspect Regularly: Look for damage or wear on the cables. Replace damaged sections promptly. Avoid Overlapping: Never let the cable overlap itself to prevent overheating. Common Myths About Freeze Protection Cables They Consume Too Much Energy: Modern cables are designed to be energy-efficient. They’re Hard to Install: With simple guides, installation is straightforward for most homeowners. Only for Metal Pipes: These cables work for both metal and plastic pipes. Wrap Up Anti-freeze heating cables are a reliable solution to protect your pipes during winter. They work by generating consistent heat, preventing water from freezing and pipes from bursting. With features like self-regulation, energy efficiency, and easy installation, they are an essential tool for anyone living in cold climates. Invest in one today to keep your water flowing and avoid the hassle of frozen pipes.
How to Install Warm Floor Heating Cable Manufacturers
Finding the right warm floor heating cable manufacturers is crucial for a successful installation. This guide will help you understand the process and choose the best option for your needs. Choosing the Right Warm Floor Heating Cable Manufacturers The first step is to identify your needs. Consider the size of the room, the type of flooring, and the desired level of heat. You can then research different manufacturers and compare their products based on factors such as: Type of heating cable: There are two main types of heating cables: resistive and self-regulating. Resistive cables produce a constant amount of heat, while self-regulating cables adjust their output based on the temperature of the floor. Power output: The power output of the heating cable determines how quickly it can heat the floor. Warranty: A good warranty can provide peace of mind and protect your investment. Customer support: Choose a manufacturer with excellent customer support in case you have any questions or problems. Preparing the Subfloor Before installing the heating cable, you need to prepare the subfloor. This involves ensuring that the subfloor is level and free of any debris. You may also need to install insulation to improve energy efficiency. Installing the Heating Cable Once you have chosen the right heating cable and prepared the subfloor, you can begin the installation process. This typically involves: Laying out the heating cable: The heating cable should be laid out in a specific pattern, depending on the size and shape of the room. Securing the heating cable: The heating cable should be secured to the subfloor using staples or tape. Connecting the thermostat: The thermostat controls the temperature of the floor. It should be connected to the heating cable and installed in a convenient location. Installing the Flooring Once the heating cable is installed, you can install the flooring. The type of flooring you choose will depend on your personal preferences and the type of heating cable you have installed. Some popular options include: Tile: Tile is a durable and heat-resistant flooring option. Stone: Stone is another durable and heat-resistant flooring option. Wood: Wood flooring can be used with some types of heating cables, but it is important to choose a wood that is specifically designed for use with underfloor heating. Testing and Troubleshooting After the installation is complete, it is important to test the system to ensure that it is working properly. You should also troubleshoot any problems that may arise. Maintaining Your Warm Floor Heating System To ensure that your warm floor heating system continues to work properly, you should follow a few simple maintenance tips: Clean the floor regularly: This will help to prevent dust and debris from accumulating on the heating cable. Check the thermostat regularly: Make sure that the thermostat is set to the correct temperature. Have your system serviced by a professional: This should be done on a regular basis to ensure that the system is operating safely and efficiently. By following these tips, you can enjoy the benefits of a warm floor heating system for many years to come. Wrap Up Installing a warm floor heating system can be a complex process. However, by working with reputable warm floor heating cable manufacturers and following the proper installation procedures, you can ensure a successful installation.
How to Connect Heating Cable – A Short Guide
Heating Cable with Controller is essential to keep pipes from freezing or to warm floors during cold weather. Connecting it correctly ensures safety and efficiency. In this short guide, we’ll walk you through the steps to connect a heating cable easily. Follow along, and you’ll have a well-functioning system in no time. What is a Heating Cable? A heating cable is an electric wire that generates heat to prevent freezing or provide warmth. It’s commonly used for: Protecting outdoor pipes from freezing. Keeping roofs and gutters free from ice buildup. Warming indoor floors for added comfort. These cables come with or without controllers. A controller lets you adjust the temperature and monitor performance. This makes it easier to manage energy use and improve safety. Tools and Materials You’ll Need Before starting, gather these tools and materials: Heating cable with controller. Electrical tape. A reliable power source. Wire connectors. A screwdriver. Insulation materials (if required). Having everything ready ensures a smoother setup process. Step-by-Step Guide to Connecting Heating Cables Follow these steps to connect your heating cable effectively: 1. Read the Manufacturer’s Manual Every heating cable may have unique requirements. Always read the instructions provided by the manufacturer. Look for specific details about installation, safety measures, and voltage requirements. 2. Inspect the Cable and Power Supply Before starting, check the heating cable for any visible damage. Ensure your power supply matches the cable’s voltage and wattage rating. Using the wrong power source can lead to malfunction or safety hazards. 3. Prepare the Area Clean the surface where the heating cable will be installed. Remove debris, moisture, or grease to ensure proper adhesion. Make sure the area is dry to avoid electrical issues. 4. Attach the Heating Cable For pipes: Wrap the cable tightly around the pipe in a spiral pattern. Use electrical tape to secure it every few inches. For roofs or floors: Lay the cable flat along the desired path. Fix it using cable clips or adhesive strips provided. 5. Connect the Heating Cable to the Controller If your cable comes with a controller: Locate the input terminals on the controller. Strip the cable’s ends to expose the wires. Connect the wires to the corresponding terminals (e.g., live, neutral, and ground). Tighten the screws to secure the connection. 6. Test the Connection Plug the controller into the power source. Turn it on and set the temperature. Check if the cable starts to heat up within a few minutes. 7. Add Insulation (if needed) For outdoor pipes, add insulation over the heating cable for added protection. Avoid using flammable materials. 8. Ensure Proper Maintenance Inspect the cable regularly for wear or damage. Replace the cable if you notice exposed wires or reduced heating efficiency. Safety Tips to Remember Never overlap the cable: Overlapping can cause overheating and damage. Avoid sharp bends: Sharp angles can weaken the cable and affect performance. Use a ground fault circuit interrupter (GFCI): This reduces the risk of electric shock. Do not cut the cable: Most heating cables are not designed to be cut to length. Check your manual for details. Common Mistakes to Avoid Failing to read the manual before installation. Using an incompatible power source. Overlapping the cable during installation. Ignoring regular maintenance checks. Avoid these mistakes to ensure a smooth operation of your heating cable. Final Thoughts Connecting a heating cable is straightforward if you follow these steps carefully. Always use a heating cable with controller for better performance and safety. With proper installation, you can protect your home and save on energy costs during the colder months.
How is Mineral Insulated MI Heating Cable Used?
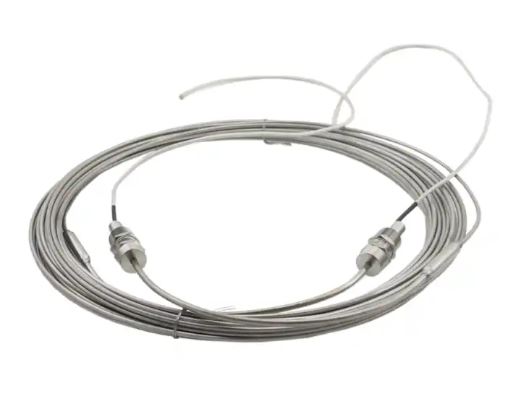
Mineral Insulated (MI) heating cable is a reliable solution for industries that require efficient and safe heat management. MI heating cable manufacturers design these cables to work in demanding conditions, offering unmatched durability and performance. These cables are made with a copper or stainless steel sheath and magnesium oxide insulation, making them heat-resistant and highly durable. This blog explains how MI heating cables are used in various applications, why they are effective, and their benefits in different industries. What is Mineral Insulated MI Heating Cable? MI heating cables are electrical cables designed to generate heat. They are composed of: Metal Sheath: Protects the cable from external damage. Magnesium Oxide Insulation: Acts as a fireproof insulator, ensuring safety and high performance. Heating Element: Produces heat when powered by electricity. These features make MI heating cables resistant to high temperatures, chemicals, and moisture. Applications of MI Heating Cable MI heating cables are versatile and serve various industries. Here are the main areas where they are used: Process Heating MI cables are used to maintain or increase temperatures in pipelines, tanks, and vessels. Key industries include: Chemical: To prevent the crystallization of chemicals during transport. Oil and Gas: For heating pipelines to avoid blockages due to wax formation. Food and Beverage: Ensures consistent temperatures in processing systems. Frost Protection These cables are installed to prevent freezing in pipes and equipment. Common areas include: Residential water supply systems. Fire safety sprinkler systems. Outdoor pipes exposed to low temperatures. Snow Melting Systems MI heating cables are embedded in driveways, walkways, and ramps to melt snow and ice, ensuring safety during winter. Industrial Equipment Heating In industries, MI cables maintain optimal operating temperatures for: Boilers. Heat exchangers. Reactors and distillation columns. Why Choose MI Heating Cables? MI heating cables are preferred for their unique properties: Durability: Their robust design withstands harsh environmental conditions. Fireproof: Magnesium oxide insulation prevents fire risks. Moisture Resistance: Ideal for damp and wet environments. Flexible Design: Easy to shape and install on curved surfaces. Benefits of MI Heating Cables Here are some benefits of using MI heating cables: High-Temperature Resistance MI heating cables can operate at temperatures as high as 1000°C without degradation. Long Lifespan Their corrosion-resistant sheath and insulation offer years of reliable operation, reducing replacement costs. Energy Efficiency These cables efficiently transfer heat, reducing energy loss and operating costs. How to Install MI Heating Cable Installing MI heating cables requires careful planning and professional expertise. Follow these steps: Design the System: Define the heating requirements and calculate the cable length. Choose the Right Cable: Select a cable that matches the system’s voltage and temperature range. Prepare the Surface: Clean the surface to ensure proper heat transfer. Install the Cable: Secure the cable using appropriate clamps or fasteners. Connect the Power Supply: Use junction boxes to connect the cable safely. Test the System: Check for consistent heating before regular use. Wrap Up MI heating cables are essential for industries needing safe and reliable heat management. Their durability, high-temperature resistance, and versatility make them a preferred choice. MI heating cable manufacturers have revolutionized heating solutions with their innovative designs. Whether for industrial processes, frost protection, or snow melting systems, MI heating cables ensure efficiency and safety in challenging environments.
What is Self Regulating Heat Tape for PEX Pipe?
Keeping pipes from freezing in cold weather is essential for homes and businesses. One effective solution is self regulating heat tape for PEX pipe. This innovative product adjusts its heat output based on the surrounding temperature, making it energy-efficient and reliable. It’s a popular choice for protecting PEX pipes, which are widely used in modern plumbing systems. How Does Self Regulating Heat Tape Work? Self regulating heat tape is designed to maintain the temperature of PEX pipes without overheating. It uses advanced technology that automatically increases or decreases its heat output depending on the pipe’s temperature. Key Features: Smart Heating Control: Adjusts heat as the environment changes, saving energy. Durable Materials: Built to withstand harsh weather. Easy Installation: Can be wrapped or secured along the pipe. Compatibility: Works seamlessly with PEX pipes. This technology ensures that PEX pipes stay warm enough to prevent freezing while avoiding overheating, which can damage pipes or waste electricity. Why Do You Need Self Regulating Heat Tape for PEX Pipe? PEX pipes are strong, flexible, and resistant to corrosion, but they can freeze in extreme temperatures. Frozen pipes can burst, leading to costly repairs and water damage. Self regulating heat tape prevents this by keeping the pipes at a safe temperature. Benefits: Prevents Freezing: Keeps water flowing even in sub-zero temperatures. Energy Efficiency: Uses power only when needed. Safe for PEX Pipes: Avoids damage from overheating. Low Maintenance: Requires minimal attention once installed. By choosing self regulating heat tape, you can protect your plumbing system and reduce the risk of winter-related problems. How to Install Self Regulating Heat Tape on PEX Pipes Installing self regulating heat tape on PEX pipes is simple and doesn’t require advanced tools. Here’s a step-by-step guide: Measure the Pipe: Determine the length of heat tape needed. Prepare the Pipe: Clean the pipe to remove dirt or moisture. Apply the Heat Tape: Wrap or secure the tape along the pipe’s surface. Check Insulation: Add pipe insulation for extra protection. Connect Power: Plug the heat tape into a properly grounded outlet. Pro Tips for Installation: Always follow the manufacturer’s instructions. Do not overlap the heat tape to avoid overheating. Use electrical tape to secure the heat tape in place. Comparing Self Regulating Heat Tape to Traditional Heat Tape Many people wonder how self regulating heat tape compares to traditional heat tape. The table below highlights the differences: Self regulating heat tape offers better safety, energy efficiency, and durability, making it a preferred choice for PEX pipes. Factors to Consider When Choosing Self Regulating Heat Tape When selecting self regulating heat tape for PEX pipes, consider the following factors: Pipe Length: Ensure the tape matches your pipe’s length. Temperature Rating: Choose tape designed for the coldest temperatures in your area. Power Requirements: Check the electrical specifications to ensure compatibility. Durability: Look for UV-resistant and weatherproof materials. Warranty: Opt for a product with a solid warranty for added peace of mind. Maintenance Tips for Self Regulating Heat Tape To keep your self regulating heat tape functioning properly, follow these maintenance tips: Inspect Regularly: Check for wear, damage, or fraying. Test Before Winter: Ensure it heats properly before the cold season begins. Keep It Clean: Remove debris or dirt from the tape and pipes. Check Power Connections: Verify the plug and connections are secure. Wrap Up Self regulating heat tape for PEX pipe is an essential tool for protecting plumbing systems in cold climates. It prevents freezing, saves energy, and works safely with PEX pipes. By choosing the right product and following proper maintenance steps, you can enjoy peace of mind during winter. Protect your pipes, save on repair costs, and ensure a steady water flow with self regulating heat tape by Cheri Heater.
5 Best Tips For Self-Regulating Heating Cable Installation
Installing a self-regulating heating cable is a game-changer for keeping pipes, roofs, and walkways safe during cold seasons. This simple solution helps maintain consistent temperatures, prevents freezing, and reduces the risk of costly damage. However, to get the best results, proper installation is key. If you’re planning to set up self-regulating heating cable, follow these five essential tips for a smooth and effective process. 1. Choose the Right Heating Cable Selecting the correct heating cable is critical. Not all cables are designed for the same purpose, so understanding your specific needs is crucial. Application Type: Identify where the cable will be used—pipes, roofs, or gutters. Pipe Material: Ensure the cable suits the material, whether plastic or metal. Temperature Requirements: Check the cable’s temperature range and wattage for compatibility with your environment. Length of Cable: Measure accurately to avoid too short or excessively long cables. Pro Tip: Always consult the manufacturer’s specifications for optimal performance. 2. Prepare the Installation Area Before laying the cable, make sure the area is clean and ready. Proper preparation avoids installation problems. Inspect Surfaces: Check pipes or roofs for cracks, dirt, or damage. Clean Thoroughly: Remove dust, grease, or debris that might affect the cable’s adherence. Secure Loose Objects: Tighten loose pipe clamps or roofing components. Checklist for Preparation: 3. Follow the Correct Installation Technique Improper installation can lead to poor performance or even cable failure. Use the right steps for success. Attach with Tape or Clips: Use heat-resistant materials to secure the cable in place. Spacing Matters: Maintain consistent spacing to prevent overheating or cold spots. Avoid Overlapping: Overlapping cables can cause overheating and damage. Pro Tip: Never cross or wrap the cable over itself. This prevents uneven heating. 4. Test Before Finalizing Testing ensures the cable works as expected before you complete the setup. This saves time and effort later. Conduct a Continuity Test: Use a multimeter to confirm the cable is working. Check Power Source: Ensure the power outlet or breaker is functional. Inspect Connections: Verify all connections are secure and insulated. Warning: Never test the cable while it’s coiled, as this can lead to overheating. 5. Use a Thermostat for Efficiency A thermostat helps regulate the heating cable efficiently, saving energy and extending its lifespan. Select a Compatible Thermostat: Choose one designed for self-regulating heating cables. Proper Placement: Position the sensor where temperature fluctuations are highest. Set Appropriate Temperatures: Follow the cable and thermostat guidelines for optimal settings. Advantages of Using a Thermostat: Final Thoughts Installing a self regulating heating cable doesn’t have to be difficult. By choosing the right cable, preparing the area, following proper techniques, testing before finishing, and using a thermostat, you ensure a reliable and efficient setup. This protects your property from freezing and keeps things running smoothly even in extreme weather. Always follow manufacturer instructions and safety guidelines for the best results. Now you’re ready to install your heating cable with confidence!